Category Archives: Uncategorized

From Drab to Fab!!

I know that this is a problem that all scrapbookers face- what do you do when you lose all hope and inspiratino for a layout that you have begun?!!
Most times we put the layout aside waiting for inspiration to strike- even though it may never again for that particular page!
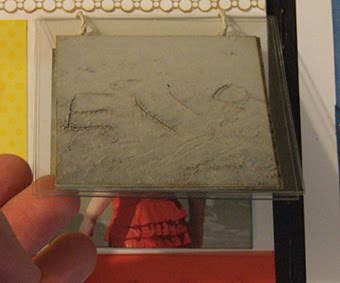
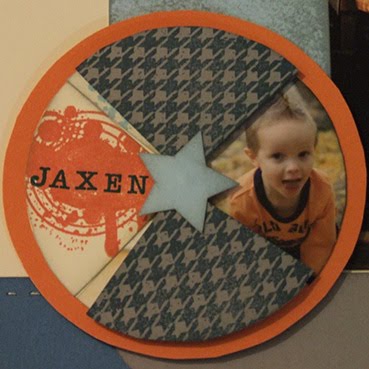
Well I am no different- below is the monkey on my back- it was literally clogging up my creative juices for months. Every time I saw it I felt guilt for not having finished it AND the pile of other unfinished layouts it was sitting on (although in my defense most of them were just missing journaling and titles).
Well, when I returned from convention- all pumped up and ready to play with my new product I made myself punish myself! NO PLAYING WITH THE NEW STUFF until I got that layout finished and put the other layouts to bed! They needed to be in scrapbooks! It was painful but I am glad to say I accomplished it and I REVEAL in the fresh feeling that now flows through me!

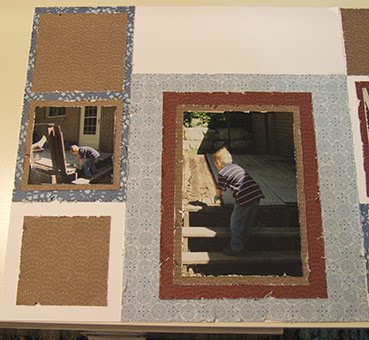
I am only showing you one side of the drab before picture- it is too depressing to see more!


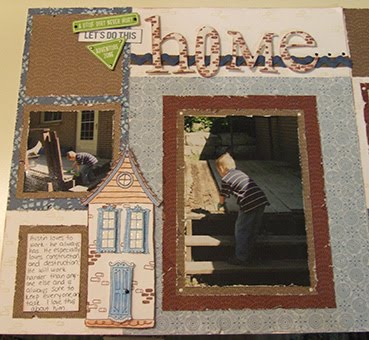
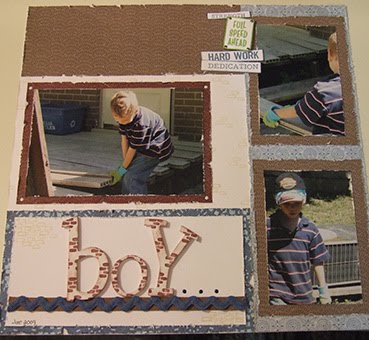
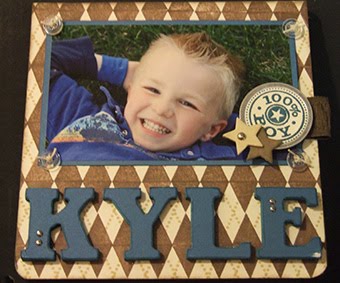
I am very pleased with my much improved layout! I created a lovely title, used the ‘Around the Block’ stamp set to accent my page and create my house accent and added some accessories.


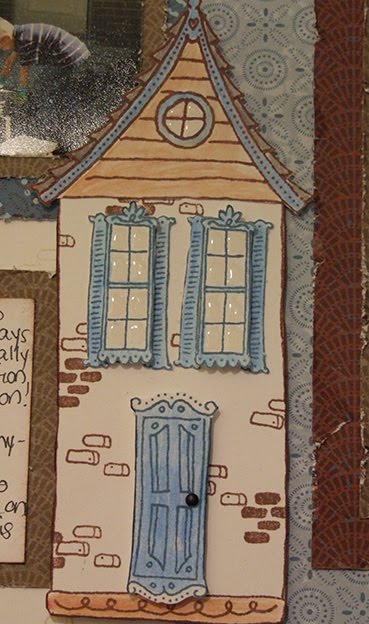
Close up of the house- now you can see the details: a bitty brad for the doorknob, liquid glass for windows and I used foam tape to pop up the door and windows. I also used colours that matched our house (even though this is a two story and we live in a bungalow!)
Have you ever experienced a similar ‘monkey on your back’ in your craft room?? Tell me about it in my comments !

Until we craft again, The Brae-er


Ist Birthday Thank You!!

I had one of my non-scrapbooking friends contact me last night and ask if I could design a thank you card for her son’s first birthday- the theme on his party is construction and trucks and she wanted it to reflect that.
Since I had to make do also with what I owned I came up with this and I LOVE it!! I think it is simple and cute and my son thought the brads instead of tires was genius!
Because it was for a young child’s party I had fun using bright colours- sunflower, holiday red and dutch blue. I used my cuttlebug to dry emboss the white paper with happy birthdays (it fits since that is what the thank you is for) and rounded the corners. The grey strip of paper is the little road for the truck to drive on.
I hope she likes it!

Until we craft again, The Brae-er


Resist Technique Using DE Throw Away and a CHALLENGE!!

When I really get in a creative flow I find that I have all sorts of garbage that collects in my bin. It seems sad that these little odds and ends have no place or purpose in my crafting room- well, now they do!!
This week I looked at my garbage with a new lens and decided that I could do a resist technique with the throw away from my DE (dimensional elements) stars (you know the piece that just holds it all together). I cut out one star and used it on the front of my 3×3 card. Using a sponge I worked crystal blue ink into the corners to create small stars as my background! I love how it turned out!!
Here is the completed card- I continued to use hues of blue to finish this card- I was playing with some of the colour combination tips from convention. This is considered a monochromatic card since I used shades of the same hue.


To finish it off I used one of the star dimensional elements and covered it with the same blue and some glitz glitter!!

Now a CHALLENGE for you!!

I want to know how you use up your bits that might otherwise be garbage in your bin- share you tip on my comments and you could win a pack of 5 handmade cards (including the one shown above)!!
Share this challenge with your friends on your blog (and let me know that you did that) and I will put a second ticket in the draw for the cards!
Have a project that shows your tip- send me the picture at braemontgomery@myctmh.com and get a third ticket in the draw!
This challenge runs until Monday July 26th!!

Until we craft again, The Brae-er


Colour Wow! The 2nd Artboard from Convention!

When I grow up I truly wish to be as talented as the people that must work in the Art Studio at CTMH! This board was one of my favourites at convention and I was so happy when I won it in one of our business classes.
This board gave more great ideas and tips for the use of colour and I share them below- read on!


The little mini book is so cute on this layout!!
4 Tips on Colour:
1. Choose colours that enhance your photos.
2. Use the “gallon-quart-pint” rule to determine your main colour and those you want to go with it.
3. Try a split complimentary colour scheme by picking your favourite colour on the colour wheel and then use the colour directly opposite it and it’s neighbor.
4. Jazz up a page with black and white photos by creating a rainbow B&T using all of the colours in the summer palette.

Until we craft again, The Brae-er


4 more projects from the Artboard!

Here are some more fabulous ideas and lots of inspiration from the artboard I won at convention. The project pictured above was my favourite!! Made from our board book and dimensional elements I thought this would make a great gift idea! The picture below shows the layering of the letters that helped achieve a solid look AND it shows how they arranged the book to make a stand up frame!
A very cute bookmark- a great gift for any child who loves a good book!


Backpack tag- great idea for when they start school- especially since so many kids have the same backpacks every year!


A very sweet and simple 3×3 card!

Until we craft again, The Brae-er


4 Fabulous Tips from Convention!!

Lucky me!! I won two artboards at convention this year! These are very coveted as they are created by the extrememely talented people that work in the corporate art studio. The boards I won focused on colour and I will share with you the 4 tips that they shared with all of us!
1. When you have busy patterns and textures, let colour be your embellishment.
2. Use the lipstick marks (in the catalogue at the top of most pages) to inspire you.

3. If you have a favourite colour that you want to highlight, add it to an otherwise neutral colour scheme and watch it pop!
4. When it comes to choosing colour, be you. If it doesn’t follow a rule, but YOU like it and it fits your style… then go for it!


Watch for more beautiful ideas from this board tomorrow!

Until we craft again, The Brae-er