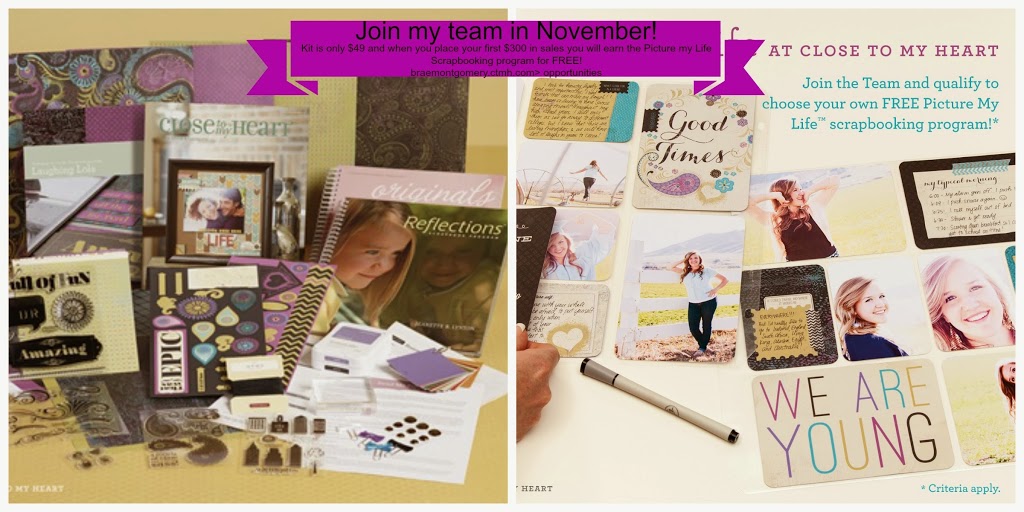
If you live anywhere in Canada now is the time- join my team and start to earn the benefits that YOU want! Product discount, earning potential, fun, friendship and papercrafting!!
Check out my website and contact me for more information
Welcome to another exciting Stamp of the Month blog hop! Every month we feature the stamp of the month so that you may be inspired by some of the artwork! I hope you find much of that this month!
If you have come from Kami’s blog then you are on the path – have fun and be sure to leave some love!
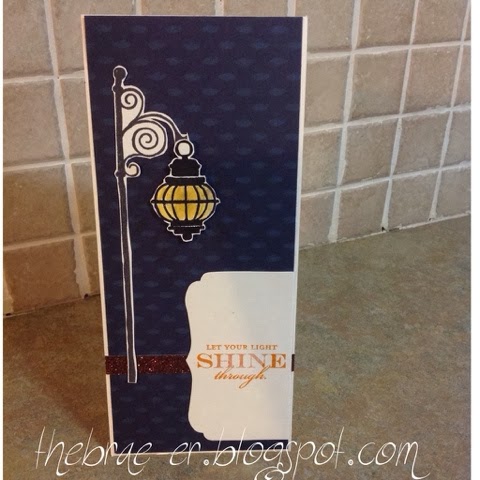
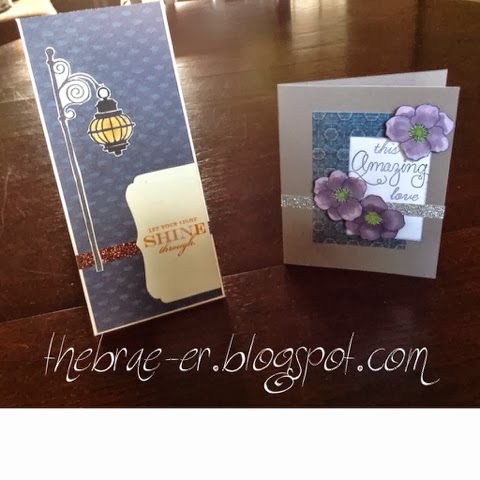
My first card features paper from the Sarita kit and one of our colonial white die-cut card and envelopes. I cut the tab off the end of the card and used it to accent the front of my card (where I have stamped the sentiment). I stamped my lamp image in our dye ink for the lamp post and the pigment ink for the light itself. This allowed me to use our alcohol markers to colour in my light. I also used the rock and roll technique for the sentiment. I inked my stamp in autumn terracotta ink and then rolled the edges in honey ink. I accessorized with some bronze shimmer trim (which I LOVE!)
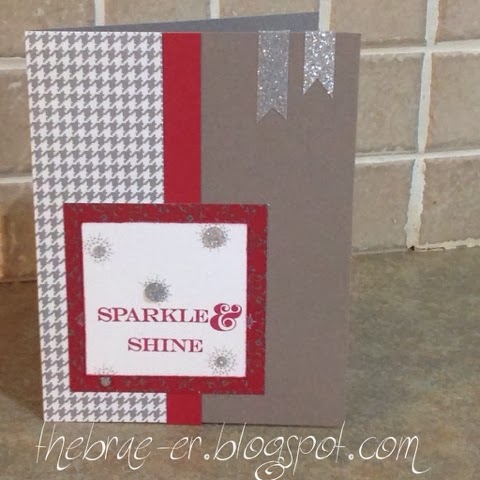
My second card looks very unlike the first- for this one I used our new sparkle and shine paper from our Holiday Gift Guide- if you are in Canada, you can view the guide here. I used the sparkle and shine sentiment to add to the feel of a Christmas or holiday card and the little lights to randomly stamp around it. To accessorize this card I added some silver shimmer trim and some glitter gems inside my random stamping.
Here is a preview of our card class this weekend at Creativ Fest in Toronto- we will be focusing on how to use our alchohol-based markers and making beautiful artwork while we do this!
See more about our classes here– this one is only $5! Register early to avoid disappointment.
Want to see the great stuff in store for you if you have signed up for the classes at Creativ Fest?! I will be sharing them today and tomorrow!
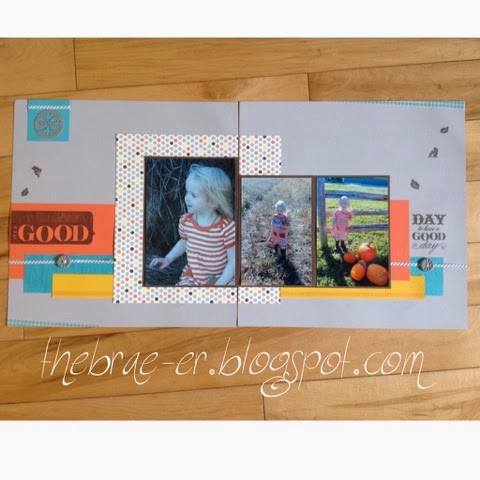
Here is the first one- our two page layout class! Learn the basics of stamping plus the rock n roll technique. Use babycakes paper in a way that has nothing babyish about it and take home gorgeous layouts just waiting for your fall pictures!
The show is this weekend but it is not too late to reserve your space – click here to see the details!
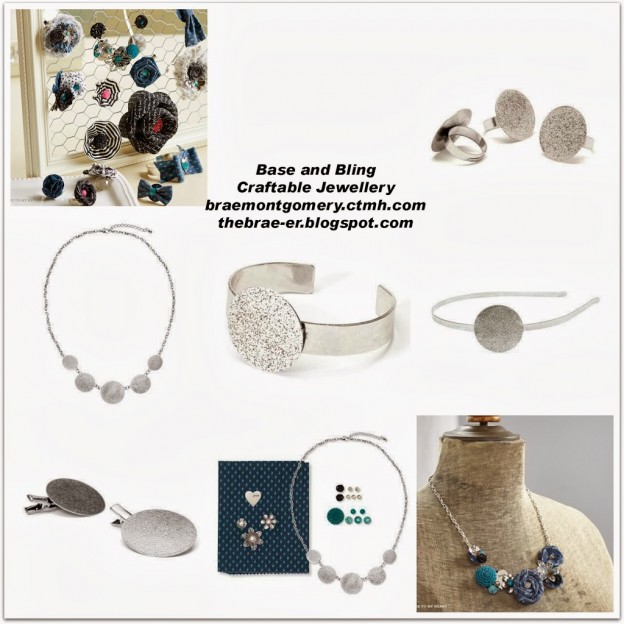
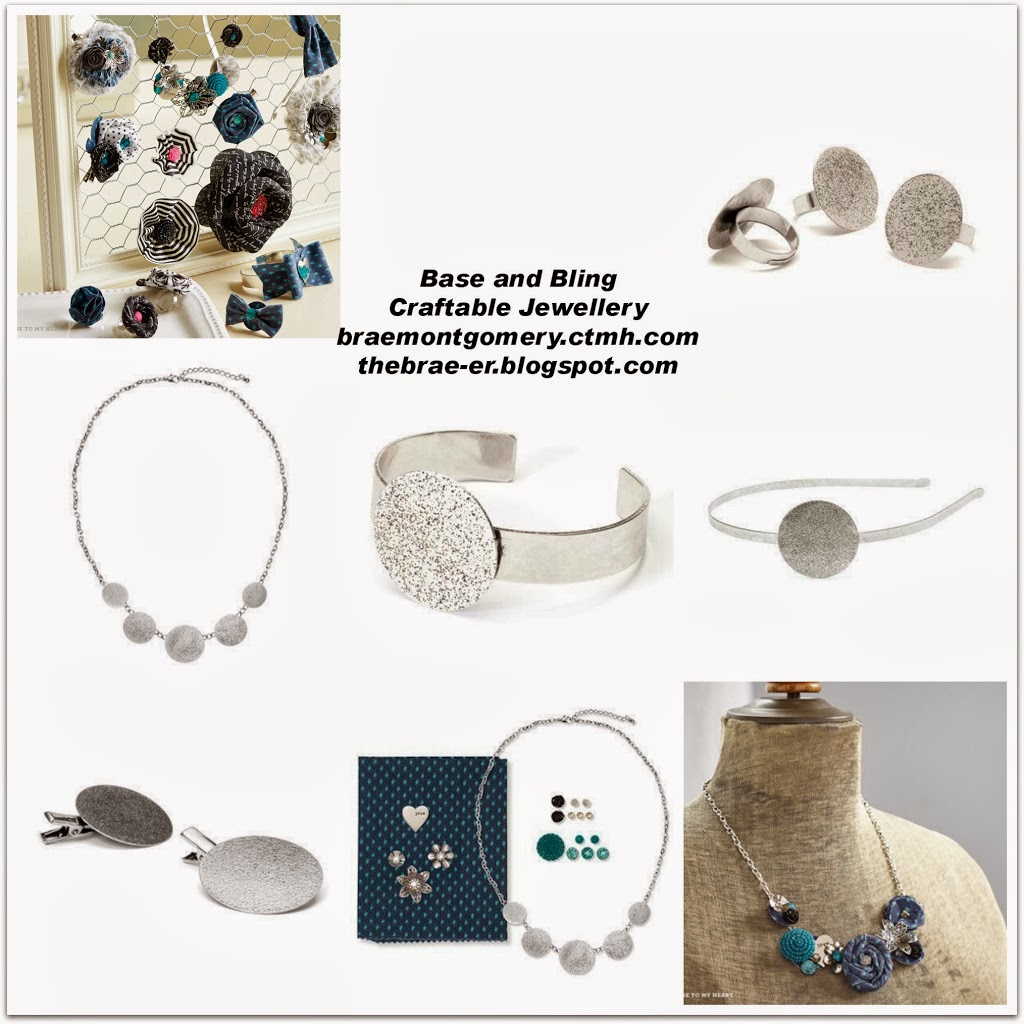
This month we are featuring our Base and Bling line which is craftable jewellery and it is AWESOME! If you have come from Sheri’s blog then you are on the path!
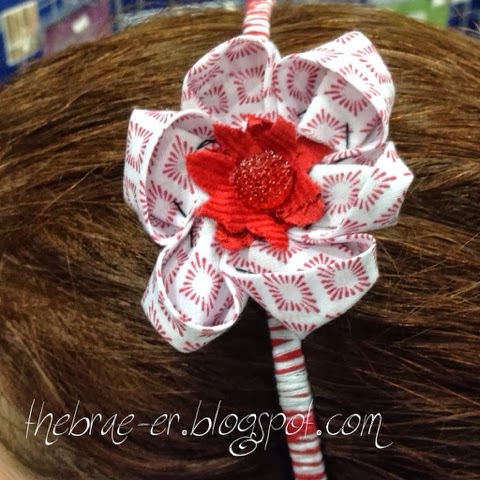
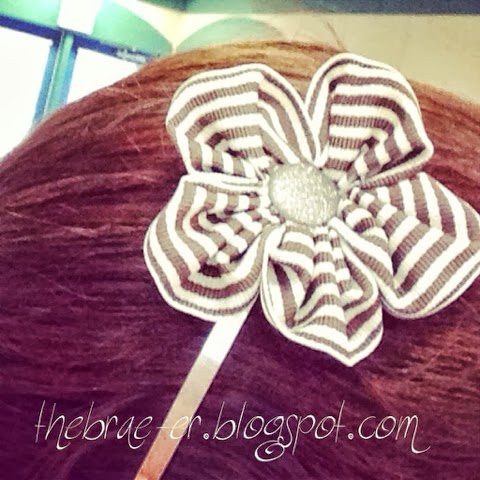
If, like me, you have a young girl in the house you can make the cutest things- hair clips, headbands, rings, necklaces and cuffs! If you have pre-teens or teens they will LOVE that they can easily make their own fun stuff!
Purchase the bases and then add on some of textiles and fun accessories and you can create just the look you like!
Want to know how to get started? Want to learn how to sew a cute and easy flower- watch my video below.
Here are some pictures of a few of the pieces you see in the video and here is a link to my past blog post that showed you how to make the flower featured on the hair clip.
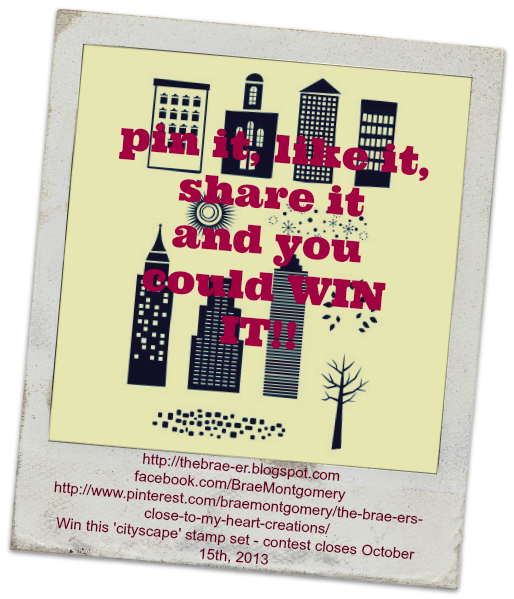
Before you go though – leave some love and please PIN the work you love!
Also enter my pin to win contest- it closes at the end of the day today!
Now hop on over to Cheryl’s blog for more Base and Bling inspiration!
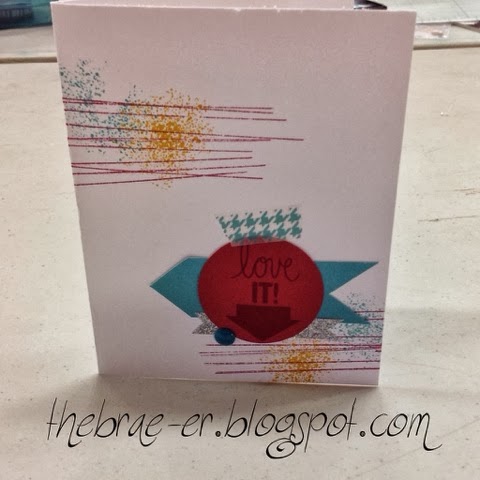
To celebrate I made this neat card which was inspired by something I saw on pinterest.
I used the stamp from the Laughing Lola Card Workshop on the go for my splotches. To get the red lines I inked up the side of my ruler and stamped it (such a fun idea!)
My circle and arrow are off the Cricut Artbooking cartridge and the ‘love it’ stamp is off one of the stamps in the bundle. Last I added some shimmer trim, washi tape and an aqua dot!
A new video from CTMH and this one features our background stamps- I LOVE these as they are so versatile. I didn’t know the video was coming out but used the very stamp they feature in a card I recently created.
What do you think?
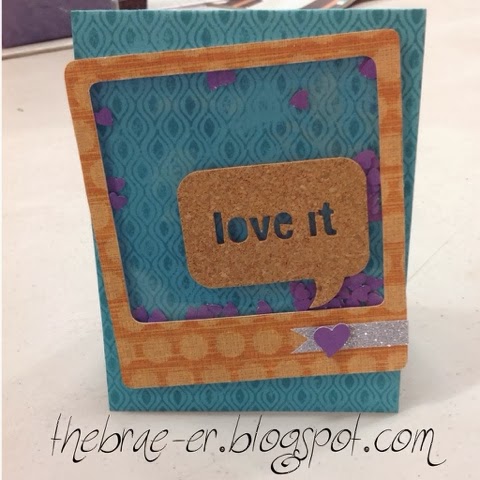
This card features lagoon cardstock that I stamped on with the background stamp in lagoon ink. I then used the Cricut artbooking cartridge to cut out the polaroid shape for my shaker box AND to cut out LOTS of little hearts to be the bits in my shaker box. I used some acetate and our 3D foam tape to create the shaker box and decorated the front with a cork embellishment, some shimmer tape and another heart! I love how it turned out 🙂
Welcome to my team blog hop! This month we are featuring things that fit a theme:
“Give thanks”
I hope you enjoy the artwork that each of us has created. Follow the links below to go through the hop (a full list is posted at the bottom if you get off track).
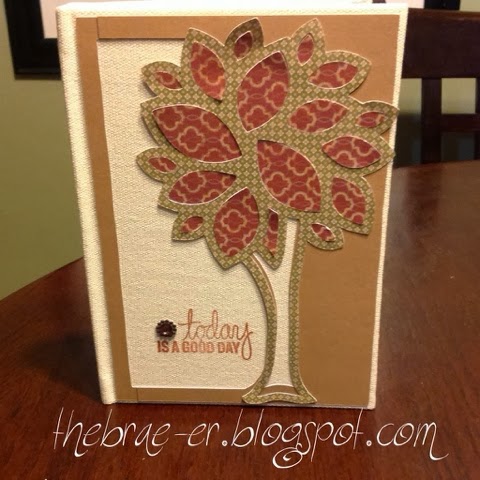
I created this cute canvas journal to give as a gift- the recipient can use it to write about all the things she is thankful for in life!
To create the front image for the journal I used one of our overlay images from our Cricut Artbooking cartridge and the Huntington paper. I accented this with our Rosewood mini medley and a phrase from one of the stamps that comes with the Cricut Artbooking (stamped in pigment ink).
Did you know this cute journal is only $2.25!! I have to admit I bought a bunch- they will make great gifts for the holidays once decorated! Check out all the clearance items on my website here!
Welcome to the blog hop- this month we are pleased to be sharing with you this sweet Christmas stamp that I call ‘ikea Christmas’ LOL!! If you have come from Kami’s blog then you are on the path of fun and inspiration!
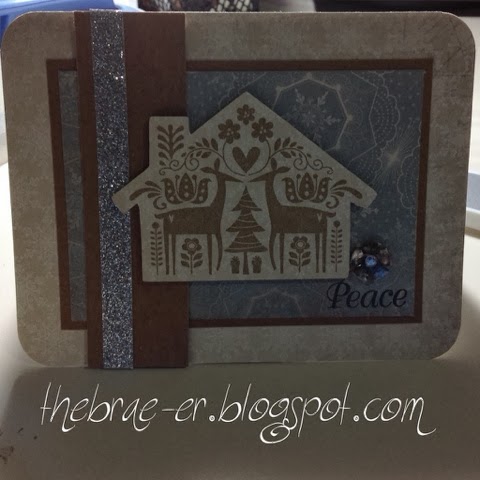
This card is not only part of my art for the blog hop but it is also the card that we are creating army home parties this month – lucky ladies!! My card was created using one of the card patterns from the Make it from Your Heart volume 2. I also used Frosted paper, Kraft paper,silver shimmer trim, base and bling metal flower and cricut Art Philosophy.
Thanks for stopping by and please leave some love!!
Now hop on over to Michelle to see what she has crafted up for you!