Category Archives: #ctmh

Brae-er Team Blog Hop: Cricut Inspired Creations

For this blog hop I wanted my team to show up creations made with any of the three CTMH Cricut cartridges- we have Art Philosophy, Artiste and now Artbooking!  So much to chose from.

I hope you like what they have come up with – the full list of team participants is posted below.

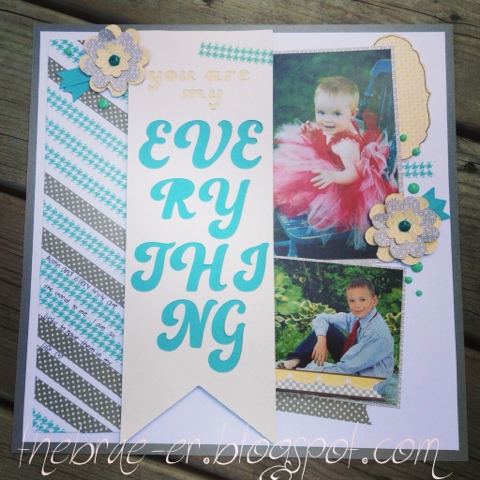
I created a one page layout featuring my super-cute kids! This page has a small amount of paper from the Babycakes collection but otherwise is cardstock and washi tape.  I used both our lagoon and grey dot washi to create my diagonal patterned paper and even wrote my journaling between the pieces of washi.

I used artbooking to cut out my flowers and the small accent to the right of my daughter’s picture.  I also used artbooking to create my title – to do this I used the Cricut Craft Room so that I could create a negative image with the font, which I then backed with cardstock. 
I also accented the page with Aqua dots (seriously the BEST little accessory we have right now!).

I hope you were inspired by this page. Now hop on over to Sheri’s blog to see what she has for you! 

Until we craft again, The Brae-er


September Stamp of the Month: Poster Tidings

Welcome to the Stamp of the Month Blog Hop! If you have come from Lisa’s blog then you are on the path to a lot of inspiration and fun!

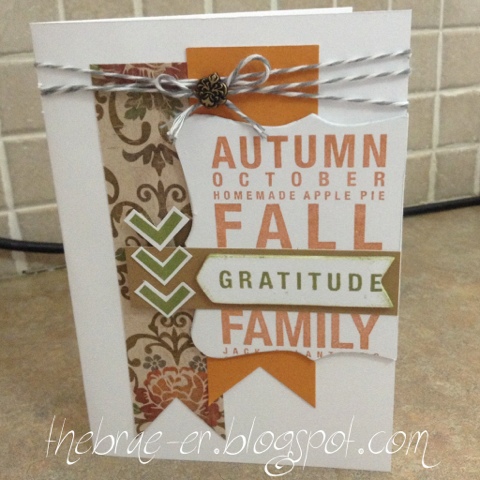
I am sure you have all seen how these font posters are HUGE in decor and home projects. I LOVE that we came out with a stamp version- this stamp has one for fall and one for winter.  There are many fun ways to use this set and I am going to share two with you- the first one is a card I created especially for this blog hop.
The card features the following products:
Huntington paper packet
Sarita assortment
Reel Life Stamp set
September Stamp of the Month
Neutral Assortment Baker’s Twine

My next project was featured on my blog a while back but since it used the same stamp set I wanted to show it again- you can find details about it here.
Now hop on over to Krista to see what she has created!

Until we craft again, The Brae-er


Stamp Camp Layout

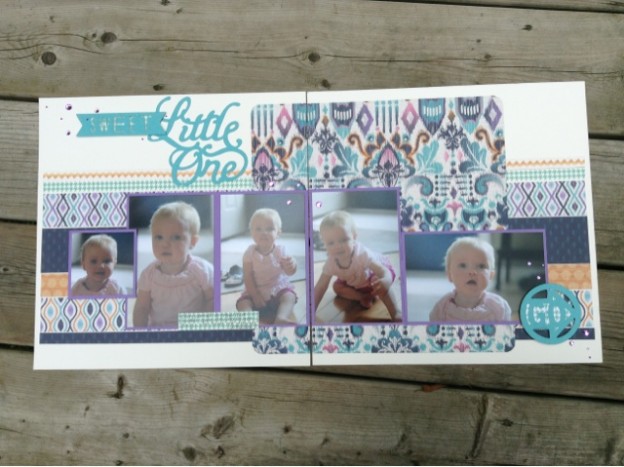
Every Idea Book release my team gets together to share new product, ideas, information and to have some fun! This events are called Stamp camp.  We usually invite some customers as well since we do a fair bit of cropping while we take in everything else.  This past weekend we held our fall/winter event.

I taught three classes that day- a spin card, the Base and Bling necklace kit and this layout.  I LOVE how this one came out- the layout is inspired by one I saw on pinterest.

Product used:
Sarita paper
Purple spakles
lagoon houndstooth Washi tape
Cricut artbooking

Everything on here is pretty basic but I did want to show my team some ‘versatile’ ways of using Washi tape- I used it as a piece of my background paper, used it to back my GO image and used it for my journaling spot. I LOVE washi!


Until we craft again, The Brae-er


Thinking outside the Box!

Every so often I like to really try to challenge myself. Often this fails…miserably! But I am glad to share that this time was not one of them!

I am, in fact, in LOVE with what I created the other day.  I will admit that this page was inspired by something I saw on Pinterest- but that is where it ends, just inspiration.

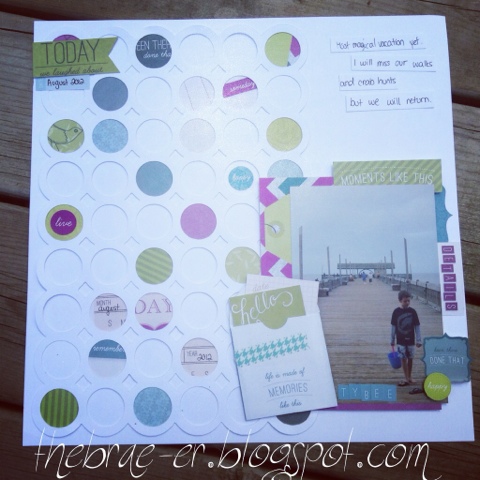
To create this fun page I used one of our Cricut Artbooking overlays that was intended for a 8 inch mini book page. I used the ‘Fit to Page’ feature on the cricut to make it as BIG as possible.  My overlay is white daisy as is my base page.

Now, this is where I was thinking out of the box- instead of just backing some of the holes with paper (which yes I have lots of) I decided to use only a package of our Crush Assortments- they are 4.95 and beyond the Washi tape are the ONLY other thing used to dress up this page!  I used pieces placed together to make my photo mat, used more pieces for journaling and one of the cute little envelopes to hold it.  I used one of my hole punches and punched holes in a lot of the other bits that come in this assortment.  I even thought about what I was punching out so that I could use features if possible- one example is my month and dateto the left of my photo.  I mixed it up and had fun with the bright colours! 

LOVE how this turned out
LOVEd the process of creating it
LOVE, LOVE, LOVE

Until we craft again, The Brae-er


Sugar and Spice and So Very Cute!

I love the time I have had lately in my craft room. They have been sweet hours or even minutes spent remembering fun times with my children and getting my fingers inky! I will miss these days when school and work start up in the fall and the family schedule reduces my time to weekly instead of daily 🙁 

In the meantime I will cherish each sweet moment!

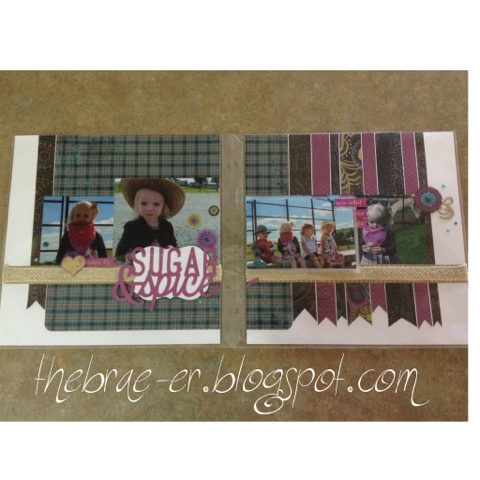
This layout was created using the Laughing Lola paper- the gorgeous plaid print in the pack was the perfect fit for pictures of my daughter at a farm birthday party! The layout itself was inspired by one I saw on Pinterest (I love the inspiration to be found there!)

I also used flip flaps on this layout- they are the perfect way to fit more photos on a layout or page without cramming them on or sacrificing some of them to the unwanted pile!  My flip flaps are stacked on this layout and create a little mini-book. I fit in 6 photos and the journaling!

A close up of my gorgeous baby girl! I couldn’t resist!

Other items used on this layout:
Cricut artbooking
Jute ribbon
3D foam tape
Laughing Lola Complements
Aqua Dots

Order them here 

Until we craft again, The Brae-er


Artbooking: Halloween Layout

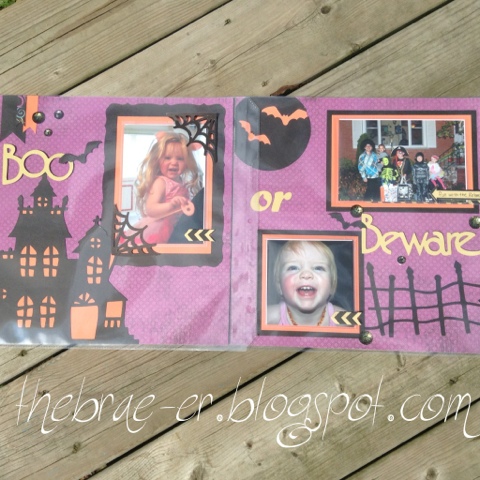
So I have a confession to make? I do not like scrapbooking Halloween! I have LOTS and LOTS of pictures and they are wonderful but for some reason I never feel inspired to work on scrapbooking them! It is like a chore but it is one that I really need to do.

When I saw our artbooking cartridge for the first time I noticed the cute Halloween layouts right away and thought- cute! and then moved on….
but they are cute and I REALLY needed to get some of these photos on paper so I sat down and did it! One layout anyway.

I did enjoy doing this one for the majority of the time… it did start to get to the point where I had to force myself to finish.  I think I have a block for this holiday beyond the event itself- once the fun decor and costumes get put away so does the whole event for me.  This year I will scrapbook photos during the holiday…. I bet that will help! LOL!

For my layout I wanted to fit a bunch of photos on- so I used our flip flaps! They are the perfect way to add more photos without making your page crowded.  See my close up photos below of one of the flip flaps- we now have a variety of sizes (here I used two 4×6 and a 4×4).

Product used (all Close to my Heart)
Laughing Lola paper,
Black cardstock
Sunset cardstock
Laughling Lola assortment
Artbooking cricut cartridge
Flip Flaps 4×6 pack and a multi-pack
Laughling Lola complements

all of this can be purchased on my website at 

Until we craft again, The Brae-er


My Sunshine- Artbooking layout

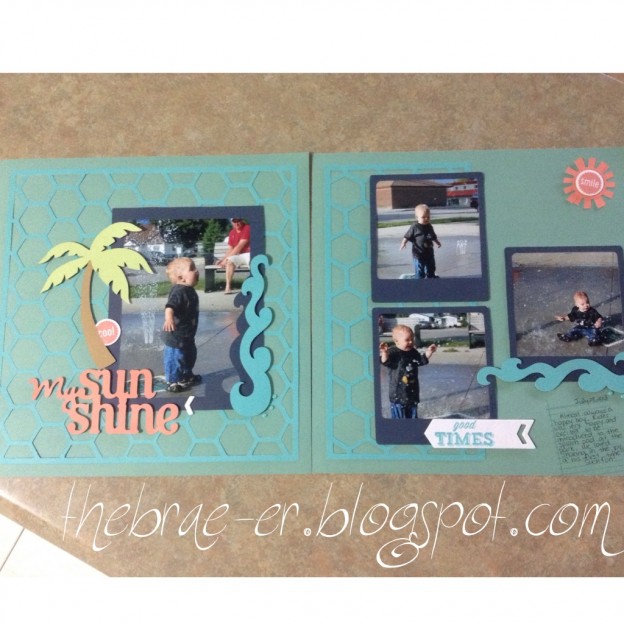
 Today we had some rain so I took the opportunity to get down into my studio and scrapbook some summer sunshine with my Artbooking cartridge!

For this layout I used a variety of cardstock- I had no summer paper (or any other paper) that really worked in a way I wanted.  Colours used: Juniper, Lagoon, Outdoor Denim, Sorbet, Desert Sand and Sweet Leaf.  

ALL of the pieces on this layout were created with ONE KEY of the artbooking cartridge! I just selected the 11′ size at the start and cut all the pieces! The cartridge did all the work of making my pieces the correct size for the layout.  I also added a bit of stamping with one of the stamp sets that comes with the Artbooking cartridge- they fit perfectly on the layout and perfectly on the die elements that also came with the Artbooking cartridge.  


Here are some close up views of the detail.  The accessory item I used beside and beneath my waves are some of our new Aqua dots.  

If you have yet to order Artbooking and are located in Canada then feel free to order from my website at http://braemontgomery.ctmh.com

Until we craft again, The Brae-er


August New Product Blog Hop with the Brae-er’s

Welcome to the Brae-er’s New Product Blog Hop! We are featuring some of the fantastic new product from our fall/winter line- if you have not yet received your copy of the Idea Book (and live in Canada) then contact one of us today and we will be happy to mail you one!

Now, enjoy what we have to offer and I hope you leave feeling inspired!

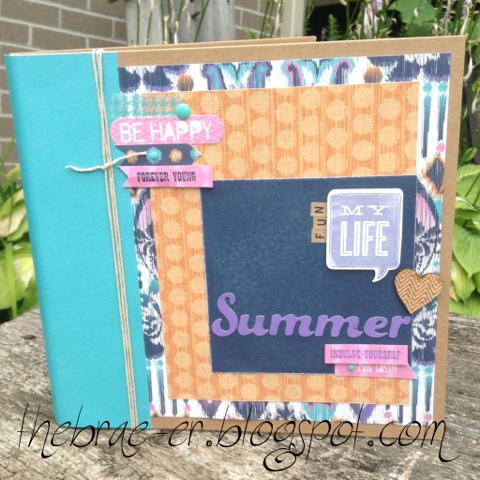
For my project I used our new Kraft 3 ring binder- this is of a size to fit 8×8 pages in it (and guess what?! Our new Artbooking cartridge makes the perfect sized pages to fill this little book!)  I thought it would be fun to make a book of summer memories- this year our’s are a little different as my son had heart surgery and we have to make memories that he can do.  This means some thinking outside of the ‘box’!

Below I have a close up of the main cluster and title area.  Product used is listed below and after August 1st if you would like to order any of it please visit my website at http://braemontgomery.ctmh.com or contact me directly.

Product:
Sarita paper pack (I am in LOVE with the colours of this one!)
Artbooking cartridge 
Sarita Assortment
Kraft Alphabet Letters
Aqua dots
Natural Hemp
Lagoon Houndstooth Washi Tape
Kraft 3 ring binder

Now hop on over to Heather’s Blog to see what she has in store for you!

In case some of the links are not working here is the full list!

Until we craft again, The Brae-er


Bibbidi-Bobbidi-Boo!

Bibbidi-Bobbidi-Boo, my daughter is turning two!

AND since she is obsessed right now with Cinderella we are having a Cinderella themed party (complete with an attending Princess).  The party is quickly approaching so I finally sat down and made the invites- I am VERY pleased with how they turned out!
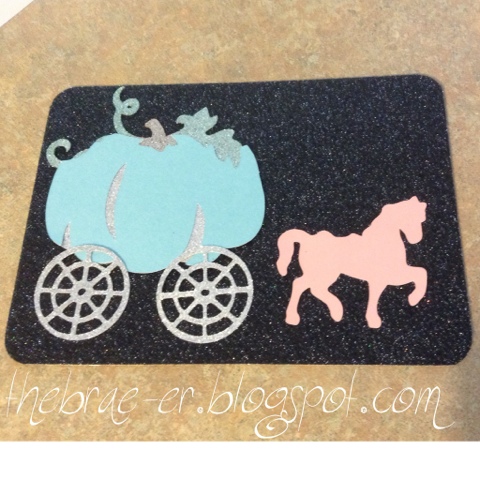
The base of the card (which is a postcard style invite) is CTMH black glitter paper.  All of the images on the invite were cut with the CTMH Artiste cartridge or the CTMH Artbooking cartridge- I love that with a little imagination I was able to find everything I needed! 
Invite size is 5×7
Pumpkin image- Artbooking, cut at 3 1/2 real dial size
Carriage wheels- Artiste, cut at 1 1/2 (they are actually meant to be the carousel base)
Horse- Artiste, cut at 6 1/2 (this cuts you two horses)

Obviously piecing the invite together was easy after everything was cut- the last thing I did to add some detail was coloured part of the pumpkin with a cheap marker. You can see the brown and green detail at the top of the pumpkin.

NOW to get ready for all the other pieces that will pull this party together! 

Until we craft again, The Brae-er