Author Archives: Brae Montgomery

Cross Canada Canvas Blog Hop

Welcome to our cross Canada blog hop for May featuring canvas!! If you have come from Sheri then you are set to cross our gorgeous country with us and our artwork!
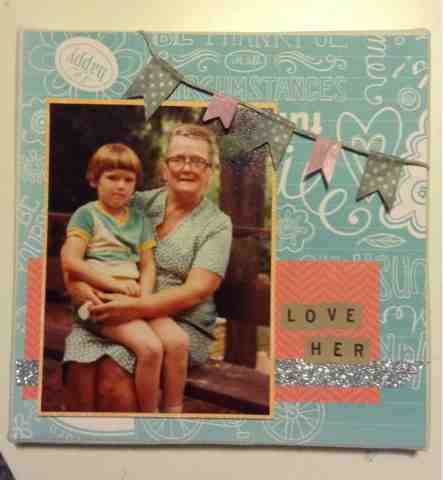
Getting your artwork out if your albums and on to your walls is a great way to share your memories and our 6×6 canvas is a great way to show off your stuff! I used mine to feature a photo of my Grandmother and I. An important photo FULL of memories for me that I can revisit all the time now that it lives in my wall and not just in a book or pile of photos. 

Product used: Dream pop paper, shimmer trim, Kraft alphabet, washi tape ( grey is CTMH, pink is another brand), canvas and natural hemp. 
Now hop on over to Carol and see her creation!

Until we craft again, The Brae-er

Oh how I love to …. ORGANIZE!!!

I love to organize my house!  Nothing to me feels better than a clean and organized house- if 
only it would stay that way!  
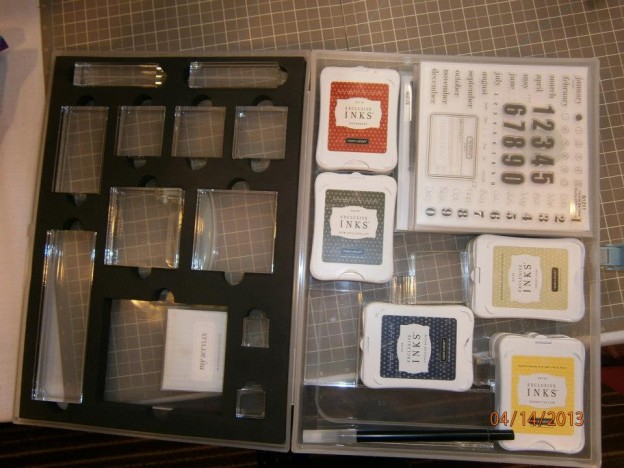
My scrapbook space always proves a challenge for organization but I am slowly conquering this with the help our the Close to my Heart organizers- they are now available in small, medium and large and have soooooooo many different uses!


Above is one of our small organizers- this one shows it with the block organizer added in.  A great way to keep your blocks organized and looking great! It leaves some room for you to add some inks or stamp sets. Perfect for when you go to crop at a friends for a few hours!

Here you can see our large organizer (my favourite!) holding our stamps- we do have an organizer specifically for them called the my Acrylix Organizer and it holds 16 stamp sets BUT the large organizer can hold up to 40 AND it has room still in the lid so I place my E sized stamp sets on top!

Here is a medium organizer opened up- holds soooo many small accessories that otherwise would have been a mess to manage!

Another large organizer, this one shows that it can hold your stamps and some tools- perfect for crop days or retreat weekends!


And our small organizer- this one with the insert for the craft boxes.  These little boxes are wonderful for holding all the small bits and pieces crafters collect!

Other uses:
storage for photos – the medium will hold them in their sleeves
large photos and kid artwork- I place mine flat in the medium organizer 
some customers are placing their inks in the organizer 

to order yours please visit my website at 
http://ctmh.com/braemontgomery


Until we craft again, The Brae-er


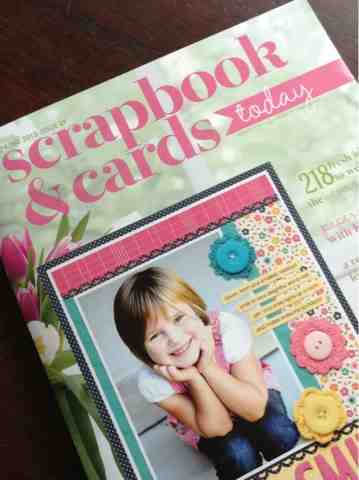
Inspired by… Scrapbook and Cards today!!

I have been enjoying time in the craft room today and have been trying out new areas of inspiration! Here is some of today’s work.

 
For this layout I used Dream Pop paper, the It’s a your Day stamp set from last falls national stamping month promo and canvas shapes all from CTMH

Here I used more Dream Pop ( it is so versatile!) and sparkles and glitter trim! Get all this product on my website at http://ctmh.com/ braemontgomery

Until we craft again, The Brae-er


Big Picture Pajama Party with CTMH


Close To My Heart is teaming up with Big Picture Classes to bring you a live webcast with step-by-step instructions for making this Happy Thoughts kraft container. The FREE webcast will air Thursday, May 30 from 7:00 pm to 8:00 pm (MDT). During the presentation, you’ll learn to make several projects from a variety of sponsors, including Close To My Heart’s Happy Thoughts kraft container, as the presenter walks you through the steps. Watch the Pajama Party by yourself, with other Consultants, or with your customers for a fun crafting pajama party. Anyone with an Internet connection can watch, so be sure to order your project supplies in advance and then tune in!
The Pajama Party class will be available for FREE atBigPictureClasses.com on May 30. If you would like to interact on the message board, participate in live chat, post to the gallery, download handouts, or enter any contests, you will need to log in to the Pajama Party “classroom” by creating a free account on the Big Picture Classes website.
To make our Happy Thoughts kraft container, you will want to have the following items—or similar products—on hand:

  • My Acrylix® Frame Flair Stamp Set (D1546)
  • My Acrylix® Happy Thoughts Stamp Set (C1536)
  • Chantilly Paper Packet (need 1 sheet of B&T, X7163B)
  • Crème Brulee Cardstock (need 1 sheet, X5754)
  • Lagoon Cardstock (need 1 sheet, X5762)
  • White Daisy Cardstock (need 1 sheet, 1385)
  • Whisper Cardstock (need 1 sheet, X5929)
  • Whisper Exclusive Inks® Pad (Z2172)
  • Lagoon Exclusive Inks® Pad (Z2195)
  • My Creations® Kraft Container (Z1833)
  • Baker’s Twine Neutral Assortment (need 3 yards, Z1701)
  • Color-Ready Trinkets Wooden Shapes (Z1844)
  • Sparkles Black & Grey Assortment (Z1754)
  • 3-D Foam Tape (Z1151)
  • Micro-Tip Scissors (Z534)
  • Corner Rounder (Z1912)
  • Paper Trimmer (Z1783)
  • My Acrylix® Spritz Cleaner (1778)
  • My Acrylix® Stamp Scrubber (Z1782)
  • 2″ × 3½” My Acrylix® Block (Y1009)
  • 4″ × 5″ My Acrylix® Block (Y1012)
  • Cricut® Art Philosophy Collection
Order these at my website http://ctmh.com/braemontgomery (or contact me as I do have some of this stuff currently in stock!)

Until we craft again, The Brae-er


Pinterest Inspired and Oh So CUTE!!

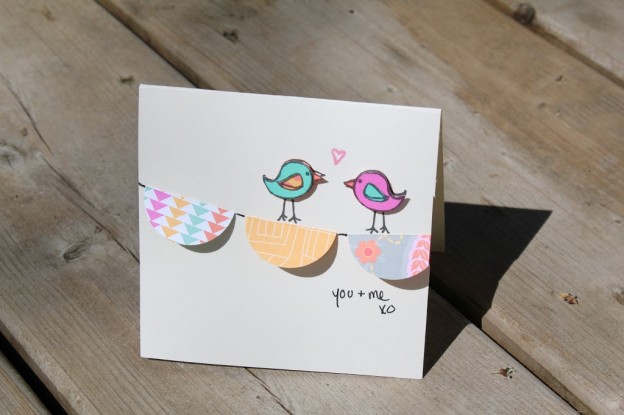
I am sure by now EVERYONE who has purchased and received their Dream Pop paper is loving it! I cannot get enough of the bright and fun colours! I already know I will be using it all month- later this month my team will be featuring another blog hop and this one will feature Pinterest inspired projects- like my little birdie card featured here! 
How did I create this? I used the CTMH circle punch to make my circles for the banner (they are folded in half), used a nice black pen for the sentiment.  My little birds come from a retired stamp set but every spring we have at least one set that features some cute birds! I paper-pieced my birds to give them lots of dimension and colour and popped them up with some foam tape!
Want to get your Dream Pop paper?
Go to http://ctmh.com/braemontgomery and click on SHOP! For every $35 you spend you will get a package of Dream Pop for only $10! That is 12 beautiful prints and 12 glossy embossed pieces of cardstock!

Until we craft again, The Brae-er


Scrapbooking weekend SUCCESS!!

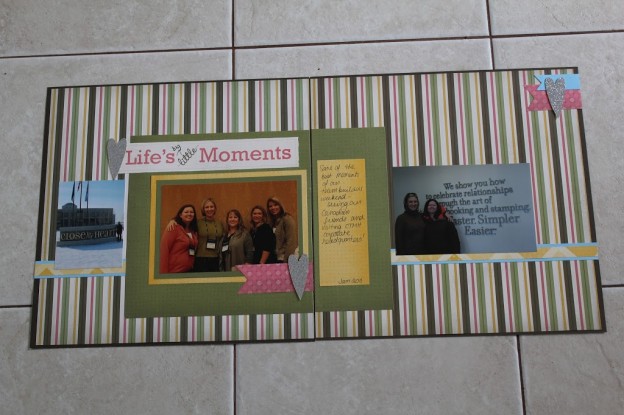
Well a weekend away seems to be necessary for me to get some scrapbooking done on a grand scale! I decided to really focus on partially finished products during my spring weekend retreat and I am pretty pleased with what I got done!

Not all the paper’s used are Close to my Heart and some are not current either BUT I know we all have a stash similar to this and it is important that we use up what we currently have in order to make room for new and fabulous product! 

Until we craft again, The Brae-er


May Stamp of the Month: Pinwheel

Welcome to the May Stamp of the Month Blog Hop featuring ‘Pinwheel’!! 
If you have come from Michelle’s blog them you are on the path!

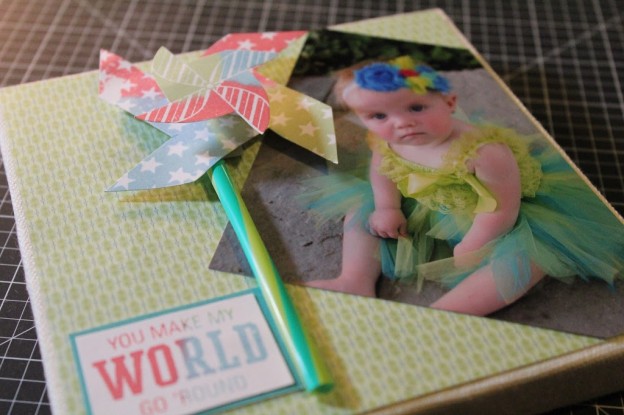
For my main project I used a 6×6 canvas display and some of our Chantilly paper.  I stamped my pinwheel using a technique called Puddle Pad- if you are interested in seeing how this technique is done then click here for instructions. 

The following layout was created using the Dream Pop papers (they are the special for May- when you make a $35 purchase you can get this special paper pack for only $10).  The Pinwheel stamp set accompanies this paper perfectly- if you are interested please contact me for more details at braemontgomery@gmail.com


Now hop on over to Tamra’s blog to see what she has in store for you!

Until we craft again, The Brae-er


The Brae-er Technique Blog Hop


Welcome to my team blog hop!
I have the best team in Ontario (in fact I think the best in Canada!) and they have worked hard to bring you another fantastic hop this month- this time featuring different techniques!

My featured technique is the PUDDLE PAD

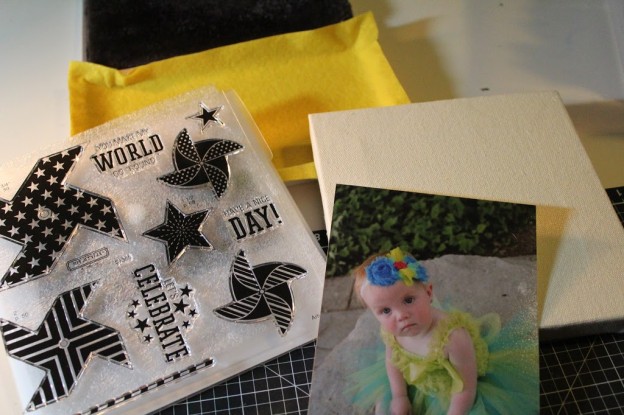
Supplies needed: felt, re-inkers for whatever colours you want to work with, disposable plate to place felt on, scrapbook materials you will need, stamp
(I used Chantilly paper and the upcoming stamp of the month for May)

Place drops of re-inker on your felt. Be sure not to overlap colours (as they may just make a mess) and make sure that the area you cover is big enough to accommodate your stamp size.
Stamp by pressing firmly but DO NOT twist your image.  Also if you need to ink your image a second time you will need to clean it first so that the colours do not mix in a way you do not intend.

Here is the finished project! I used the puddle pad to create my pinwheels and my phrase.  This is all mounted on one of our 6×6 canvas displays- a cute way to showcase your love of scrapbooking on your walls! 

Want to purchase these supplies? visit my website here.
Now hop on over to Heather’s blog!

Until we craft again, The Brae-er


It’s a Cricut Party!!!


Whether you use one Cricut®-cut piece or several, you can create cute party favors and decorations using your Artiste cartridge. Combine your Cricut® pieces with unique stamping techniques and you have projects that will knock your guests’ socks off! Want some recipes and tips for how to make this adorable artwork? Below are instructions for creating two pieces from the “Clearly the Best: How to kiss—with stamps” episode. Combine the Cricut®-cut pieces for these projects with the kissing stamping technique taught in the video, and you have a stellar 3-D item!

Recipes and Tips

Party Banner
Stamp set of your choice
X5668 Honey Cardstock
X5764 Pear Cardstock
1272 Cranberry Cardstock
Z2197 Pear Exclusive Inks® Pad
Z2163 White Daisy Exclusive Inks® Pad
Z1751 Baker’s Twine Harvest Assortment
Z1311 1¼” Circle Punch
Cricut® Shapes:
Artiste
1″ Shift+3D Object (cut 56, p. 57)

Art Tip! This banner only uses one type of Cricut® shape, but the finished product is still stunning. Use stamp kissing to randomly stamp across the pieces using the stamp set of your choice. Score with the help of the Cricut®-cut score lines on the shape and piece together to create little globes. Tie together with baker’s twine and voila!
Owl Miss You Bag
1385 White Daisy Cardstock
1292 Crystal Blue Cardstock
X5668 Honey Cardstock
X5930 Slate Cardstock
Z2162 Honey Exclusive Inks® Pad
Z2117 Crystal Blue Exclusive Inks® Pad
Z1349 Shimmer Designer Brads
Z1752 Sparkles Clear Assortment
Z1311 1¼” Circle Punch
Twist Ties
Thread
Cricut® Shapes:
Artiste
4½” 3D Object (p. 77)
4½” Shift+3D Object (cut 2, p. 77)
1″ Shift+Accent 2 (p. 51)


Art Tip! This project uses many Cricut® shapes and all the pieces coordinate so nicely for an adorable finished product. Use the Artiste assembly booklet to put the bag together and then add the embellishments. The feathers are created with punched circles that are stamped using the kissing technique; however, if you don’t have the circle punch, you can easily make these using the Cricut as well. The eyes were created using Shimmer designer brads, but you can use any large brad or button to create the same look. Finish with the “owl miss you sentiment” for a special touch.
Be sure to share these tips with your customers! The owl bag and party banner are great projects to create at a workshop or club.

Want to purchase any of this product? visit my website and you can get it all!! 

Until we craft again, The Brae-er


April Cross Canada Hop

Welcome to the April Cross Canada Blog Hop!

If you have come from Twirl n Time then you are on the correct pathway!
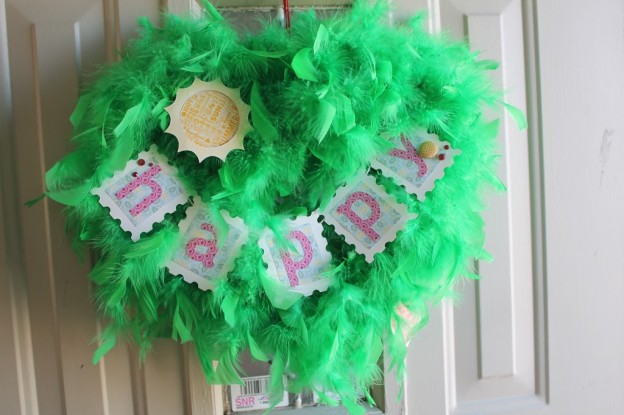
After a LONG winter I am ready for some sunshine! I decided to take this stamp and work it into a door wreath to welcome the nice weather ( I was pushing it as until this week we were still getting snow).  But the real crime came this past friday when I woke up to an ice storm that had ruined my wreath! It was wet, frozen and totally stuck to my screen door- now it is a beautiful piece of trash!
To create my wreath I took an old wreath and covered it with two green boa’s- to mimic grass and the bright colours associated with spring and summer.  I then used the stamp set to create the sunshine and the hot air baloon and attached them to the wreath with baker’s twine.
The word ‘happy’ was created using the cricut artiste cartridge- I mixed a postage stamp image with the font to create each pennant.  Paper used was Chantilly.  The stamp set I used is the My Sunshine stamp of the month for April! When you spend $50 or more you will get this set for only $5!!
If I have inspired you to create your own home decor piece and you want to purchase these materials then feel free to visit my website at http://ctmh.com/braemontgomery
Now hop on over to Carol’s Blog to see what she has created!

Until we craft again, The Brae-er